Created a simple demo application that loads video using OpenCV, converts to an OpenGL texture, and renders it in an OpenGL window with a Shader running on top of it. All colorization and animation beyond the original (nearly monochrome) video is in the shader, which was inspired by a Shadertoy Example by Justicle.
Full Image Length Line Art Demo

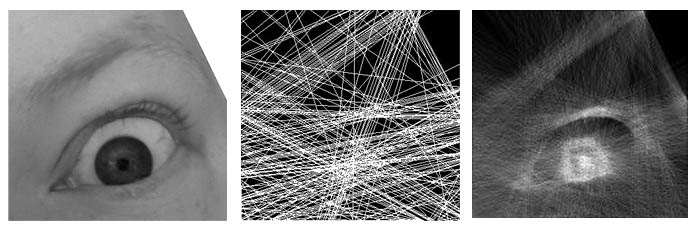 A recent post I saw here demonstrated an artists technique of plotting lines across a page so that a series of lines pass through the entire page and together create a recognizable image. This post demonstrates a recreation of the technique using software.
Results are above (original, basic render, buildup render), and the references art image:
I initially wanted to perform an exhaustive search of possible lines in the image, or find existing lines using something like a Hough Transform or curvelets. However, the exhaustive search of possible lines at each iteration was slow and complicated, so I ended up just test a couple hundred lines from a random edge to random edge and greedily minimize the remaining energy in the image.
The first iteration simply made a line across the image with magnitude one. This results of a very rough image:
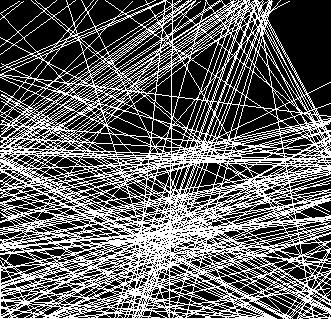
The next iteration allows the lines to build up, so lines can become darker and dark with each stroke. This results in a much nicer image while still requiring that each line fall across the entire image from edge to edge.
An interesting extension would be to choose a few colors and process a blue channel, as with the original author, rather than just processing grayscale.
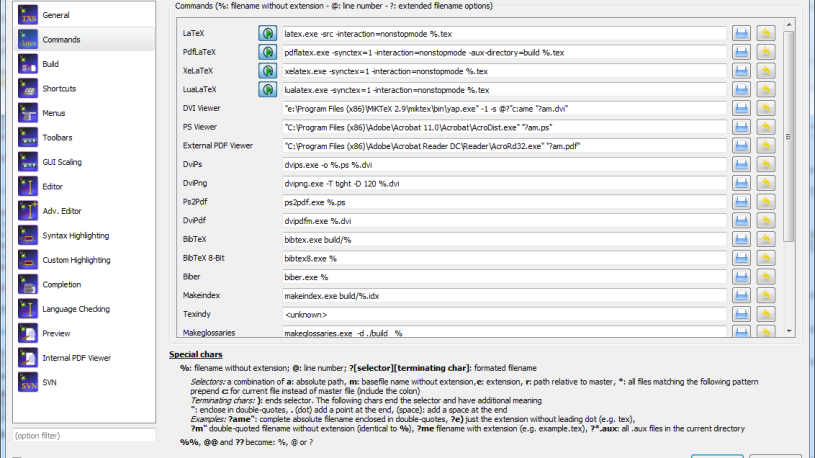
Configuring TeXstudio

TeXstudio is a tool for developing Latex documents. To Configure in Windows, do the following:
- Download and Install MikTex
- Download and Install TeXstudio
- Download and Install ActivePerl for Glossaries
- Set TexStudio to use a Build directory
- Create a folder called build in the same directory as the .tex files
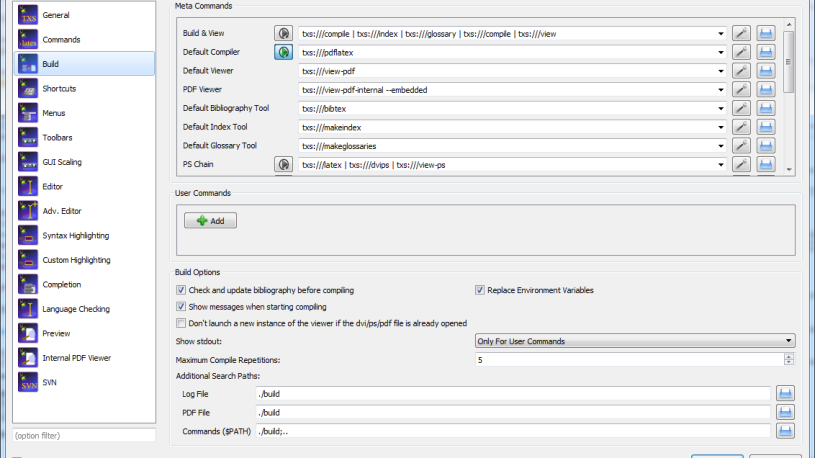
- Select Options->Configure TexStudio, select Commands tab and configure as
- Select Options->Configure TeXstudio, select Build tab and configure as:
Setting up a New Git Repository on Bluehost Shared Hosting from Windows
I can never remember how to setup a new repository. Here are the instructions:
- Create repository in windows folder
- Select the folder and right-click, select Create New Repository Here
- Don’t make it bare
- Commit a first, empty change
- Right click and commit -> “Master”
- In the message box type “Repo Init commit”
- Check the box at the bottom for “Message Only”
- Click Okay
- Modify Gitolite User Management
- Add Gitolite repository
- Add User[s] with RW+
- Setup Repo on Server
- Login with Putty
- Goto repositories Folder (example, ‘repositories’)
- Type mkdir [newreponame].git
- Type git init –bare
- Push the new Windows Repository to the new bare repository
- In Windows, right click Git root folder, choose Tortoise->Push…
- Local: master (default)
- Select Remote->Manage button
- Remote: Server[reponame]
- URL: [coreserveruser]@serveraddy.com:[reponame]
- Click Okay
- Click Okay
- In Windows, right click Git root folder, choose Tortoise->Push…
- Done!
Highchart Test
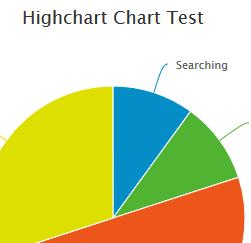
Created a basic test to evaluate Highcharts: